Welcome
I have 2 adult children, both
are happily married and doing
well. I share a home with my
Mother and pet rabbit Rex.
I've been playing with PSP
since 2001 and I'm still thoroughly
enjoying learning whilst I play.
The two main things I love to do is
tagging and tubing. I also enjoy
Photography, which I only took
up in 2016. Thank you for
visiting... please feel welcome
to ask any questions.
MY TOU
This is a 100% Copyright Compliant site.
~~~~~~~~~~~~~~~~~~~~~~~~~~~~~~
My tutorials are only a guide and I hope you use them to inspire your own creativity.
~~~~~~~~~~~~~~~~~~~~~~~~~~~~~~
All tutorials are written by me and any resemblance to any other tutorial is purely coincidental and unintentional. Please don't copy and paste them in any other website, blog, forum or social network site. Please don't try to claim them as your own. Any supplies included have either been created by me, or shared with permission.
~~~~~~~~~~~~~~~~~~~~~~~~~~~~~~
You are welcome to use them in Groups, please text link to my site or to the tutorial itself. You may not copy and paste them in your forum or group.
~~~~~~~~~~~~~~~~~~~~~~~~~~~~~~
I don't allow translation of my tuts for posting at other forums or websites. I've provided a translation tool to assist my non-English speaking visitors.
~~~~~~~~~~~~~~~~~~~~~~~~~~~~~~
If you have questions about any tutorial or you'd like to send me your results, please send an e-mail to willowhoop@gmail.com
~~~~~~~~~~~~~~~~~~~~~~~~~~~~~~
You may share links to my tutorials, my masks, templates, & word art on your forums, blogs, groups etc. Please do not share any of my work directly. Redirect to my blog for download.
~~~~~~~~~~~~~~~~~~~~~~~~~~~~~~
DO NOT ADD YOUR NAME TO MY Snags, Original Tags OR ERASE MY LICENSE NUMBER AND URL FROM MY TAGS.
THANK YOU
E-Mail Me
Wednesday, September 22, 2021
SPIDER WEB - ALEC RUD
SPIDERWEB -ALEC RUD
Supplies needed
Tube of choice. I'm using Alec Rud. Please don't use an artist's work without the required copyright.
You can find Alec Rud at PicsForDesign
Animation Shop 3
Xenofex 2 - Constellation
VM Instant Art - Spider Web
I'm using PSP9 to make this tag, but you should be able to use any version.
LET'S BEGIN.
Open 660 x 300 px canvas. Floodfill with white.
Open your tube of choice, duplicate and close original.
Resize your tube if necessary. C/P your tube as a new layer.
Mura Meister Copies - wallpaper - shrink. I changed the first box number to 25, just make sure your canvas is covered.
Adjust blur - radial blur with these settings
Twirl checked - Strength 57, Twirl degrees 8, Horizontal offset 23, Vertical offset -100 minus, Protect Center 0. Elliptical checked. OK
Effects - edge effects - enhance
Duplicate layer.
In your layer palette click on your white canvas layer, selections select all, Image, crop to selection.
Working back on your duplicate layer.
Effects - VM Instant Art - Spider Web, default settings. Choose a setting that you like, play around.
Once you are happy click OK.
I set this duplicate layer to screen. Play around with the blend layers to find what satisfies you and suits your tag.
Duplicate this layer so that you have 3 layers. Number these layers 1, 2 & 3. Close off layers 2 & 3 for now.
Open Xenofex 2 - Constellation with these settings
Remember to hit the random button for layers 2 & 3
Add your tube, position where you like.
Decorate with elements and/or word art of your choice.
Add a new layer, move to top.
Selection, select all. Using a colour of choice, flood fill this new layer. Selection, modify, contract by 3 and hit delete.
Drop shadow, 2,2,50,5
Repeat this drop shadow -2,-2,50,5
Now is the time to add your artist credits and tagger info.
Now is the time to add your artist credits and tagger info.
If you do not wish to animate, save as.
If you wish to animate, open AS.
Make sure layers 2 & 3 are closed for now
With layer one open copy merged into AS as a new animation
Back in PSP, close layer one, open layer 2, copy merged and paste as a new animation after current frame in AS. Click the little forward arrow at bottom right
Repeat for layer 3.
Go back to frame 1, edit select all
Click on Propagate Paste button. Now you are ready to add names.
Edit, save as.
Here is a second version I made using the awesome artwork
of Anna Marine. You can find her artwork at Creative Design Outlet
Here is a faboolous version by Laine
Saturday, December 12, 2020
TEMPLATE 12 - December 2020
Tutorial writers, feel free to use this template in your tutorial, however
please link back to my blog for people to download.
willowscreativecanvas.blogspot.com
You can download this template HERE
The mask I used is DD_GeoMask_6
Labels:templates | 3
comments
Sunday, August 16, 2020
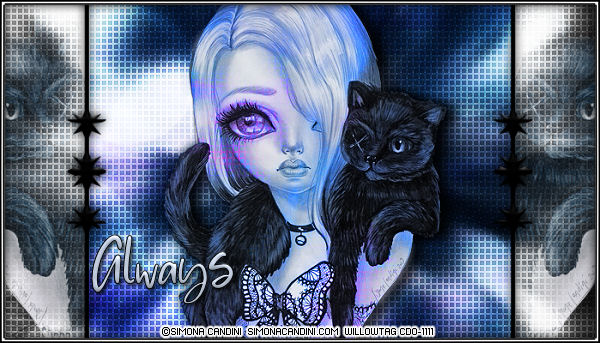
SIMONA CANDINI - BLACK KAT
SIMONA CANDINI - BLACK KAT
Tube: Simona Candini 38-1 available from CDO
Please don't use this tube without registering for a licence number.
Font:https://www.dafont.com/brightside.font
OVERLAY - I have no idea where I got this overlay from please holler if you know. You can d'load it from HERE
I used one of Tonya's amazing textures, which you will find HERE
Note: All settings are not concrete, you need to choose the settings that best suit your tube & colour choices.
I'd like to also mention that I used a b/w tube, if you chose to use a coloured tube, you might need to rethink whether you need to floodfill your sides panels &/or the choice of colour for your side panels and the settings you would use.
1 - Open a 700 x 400 canvas.
2 - C/P your tube as a new layer, resize to 600 pixels high.
3 - Mura Meister - Wallpaper - Shrink at default settings.
4 - Duplicate this layer, activate the original layer and flip it, merge visible. Your canvas should be covered, if not duplicate and mirror, hopefully the layer is not full. Rename this layer BG
5 - On BG layer, Gaussian blur 5.
6 - Adjust, blur, Radial blur with the following settings:
8 - On the duplicate: Effects, texture effects, weave with the following settings
9 - In your layer palette now, set this layer to softlight.
10 - Merge visible layers and rename layer BG
11 - Now I added the cc-dot-or bubble element. Set layer to overlay and rename this layer bubbles.
12 - Next I added Tonya's RandomTexture2 and set it to overlay as well. Rename this layer texture
13 - Add your tube as a new layer, resizing if necessary. Move tube into a position you like. I left mine centered. Rename this layer Tube
14 - Duplicate your tube layer twice, for 3 tube layers. Close off your top tube layer.
15 - Activate your middle (1st copy) tube, Gaussian blur 5. In layer palette set to hard light, or one that you prefer.
16 - On your original tube layer. In layer palette I chose Luminance.
17 - Now active your closed 2nd copy of tube. In the layer palette I used Luminance L
18 - Active your original tube layer once again, sharpen if needed than add a drop shadow of choice.
My dropshadow settings: V2, H12, Opacity 60, blur 20 colour black.
19 - Grab your selection tool, rectangle.
Custom selection:
21 - Move this new layer below your original tube. Selections, invert. Floodfill this layer with a colour of choice. I used black. Deselect.
22 - Rename this layer 'side panels'. In layer palette set your side panels to Saturation L.
23 - Copy & paste your tube again, rename this tube2. Move your tube onto one of the side panels and position the tube to your liking.
24 - On side panel layer, selections, select all, float, invert. Activate your tube2 layer and hit delete. Select none.
25 - Duplicate tube2 & mirror. Merge down.
In layer palette I chose Screen.
26 - Now grab your pen tool with these settings:
27 - Hold down your shift key and draw a line down the edge of one of your side panels. Convert to raster layer. Duplicate & flip layer, merge down.
28 - Duplicate this layer again and mirror. Merge down. Add a drop shadow of choice. Rename this layer Barbed Wire
29 - Now we add a border frame. New layer.
Make sure the new layer is your top layer.
Selections, select all, selections modify - select selections border with these settings:
flood fill your selection with a colour of choice. I chose black. Do not deselect.
30 - New layer. Selections, modify contract by 2. Now floodfill this layer with a complimentary colour. I chose white. Deselect. Name this layer Frame.
31 - Duplicate your fame layer. On the original frame layer.
32 - Adjust, Brightness & Contrast with these settings:
Now go do Gaussian blur 5. Merge the two frame layers. Rename Frame
33 - Crop your tag. I resized my tag down to 600 pixels x 350 and sharpened where necessary.
34 - Add your copyright and tagger info.
Thanks for trying my tut. If you have any questions please contact me willowhoop@gmail.com
Labels:Old School Style,PTU Art | 0
comments
Sunday, August 18, 2019
Labels:masks | 0
comments
Subscribe to:
Comments
(Atom)


